If you are looking for a simple and versatile way to create bootable USB drive, you might want to try Ventoy. Ventoy is a free and open source tool that lets you create a multiboot USB drive with multiple ISO files. It's a powerful and convenient tool that can save you time and hassle when you need to boot multiple operating systems from a single USB drive. You can use Ventoy to boot various operating systems, such as Windows, Linux, BSD, and more. In this article, I will show you how to use Ventoy to create your own multiboot USB drive in a few easy steps.
Step 1: Download Ventoy
First, you need to download Ventoy from its official website. You can choose between the Windows or Linux version, depending on your current operating system. The download file is a zip archive that contains the Ventoy executable and some other files.

Step 2: Extract and Run Ventoy
Next, you need to extract the zip file to a folder on your computer. Then, you need to run the Ventoy executable as administrator (on Windows) or with sudo (on Linux). You will see a window that shows the list of available USB drives on your computer.
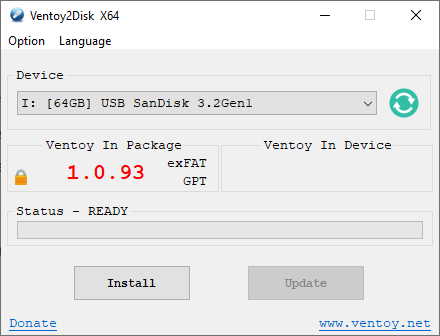
Step 3: Install Ventoy on the USB Drive
Select the USB drive that you want to use for Ventoy. Make sure you have backed up any important data on the drive, as Ventoy will format it and erase everything on it. Then, click the Install button. This will format the USB drive and install Ventoy on it.
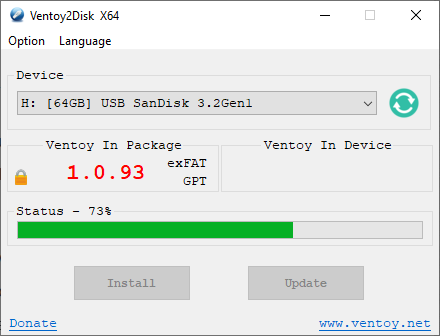
Now, wait for Ventoy to finish installing. The installation may take a few minutes. You will see a confirmation message when the installation is done.
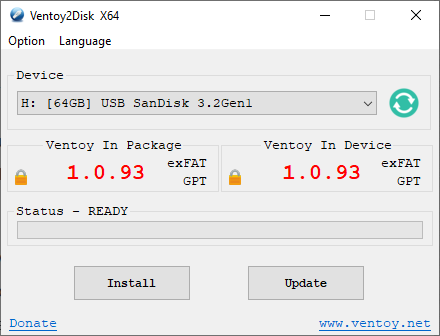
Step 4: Add ISO Files to Your USB Drive
Once Ventoy is installed, you can close the window. Now, you have a Ventoy USB drive that can boot multiple ISO files. All you need to do is copy the ISO files that you want to use to the root directory of the USB drive. You don't need to do anything else, as Ventoy will automatically detect and list the ISO files when you boot from the USB drive. You can also create folders and subfolders on the USB drive to organize your ISO files.
Step 5: Boot from the USB Drive
To boot from the USB drive, you need to restart your computer and access the Boot Menu. The exact steps may vary depending on your computer model and BIOS settings, but usually you need to press a key like F12, F9, or Esc during the startup process.
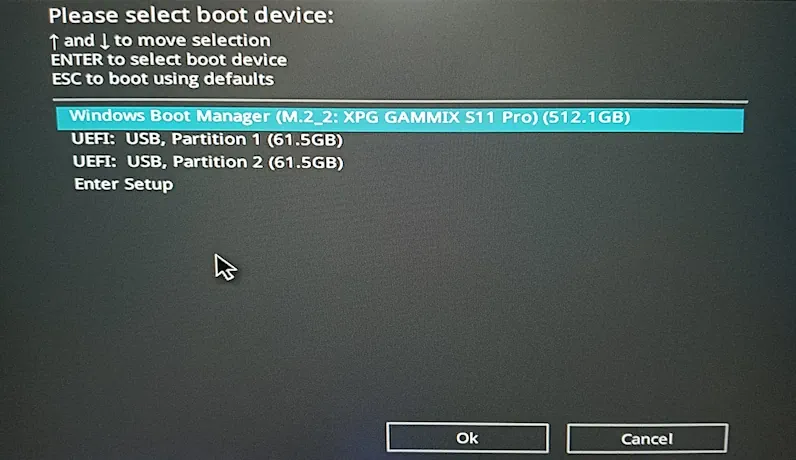
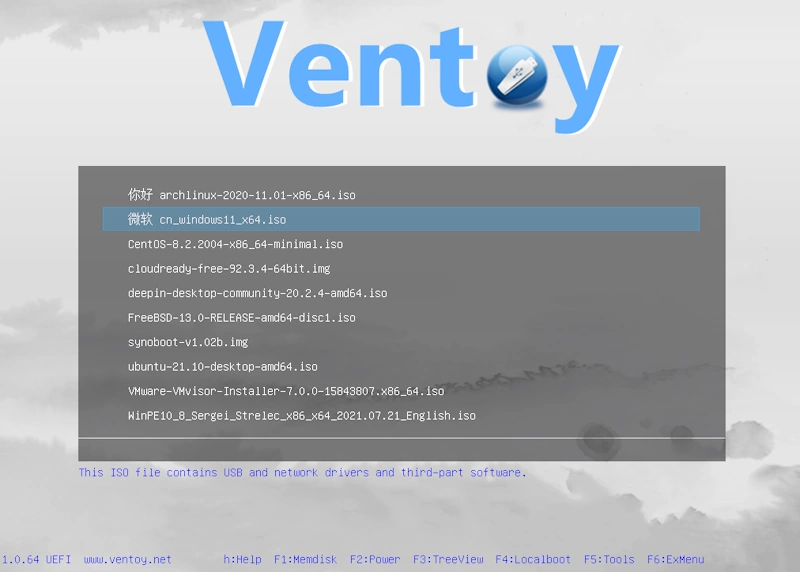
Then, you need to select the USB drive as the boot device and press Enter. You will see the Ventoy menu that shows all the ISO files on your USB drive. You can use the arrow keys to navigate through the list of ISO files and Enter key to select and boot an ISO file that you want. You can also press F1 to access some advanced options, such as changing the theme or language of the menu.
Updating and Managing Your Ventoy USB Drive
One of Ventoy's standout features is its flexibility. You can add or remove ISO files from the USB drive at any time, without having to reinstall Ventoy or format the USB drive. You can also update Ventoy to the latest version by running the Ventoy executable again and clicking the Update button. Ventoy also supports hundreds of ISO files, including Windows, Linux, BSD, and antivirus tools. You can find a comprehensive list of ISO files supported by Ventoy here on their website.
That's it! You have successfully created and used a multiboot USB drive with Ventoy. I hope you found this article helpful and informative. Thanks For Reading!
Last updated on October 25, 2025